Symfony is steadily evolving into a modern AI-enabled framework—and one of its most exciting experimental additions is the symfony/ai-store component. This new package lays the foundation for semantic search, context injection, and Retrieval-Augmented Generation (RAG) workflows directly inside PHP applications. What Is Symfony AI Store? The AI Store component is a low-level abstraction for managing vector stores. In simpler terms, it helps store documents as embeddings (numerical vectors) and retrieve them later using similarity search. This is crucial in RAG scenarios, where an AI agent dynamically pulls relevant facts from a custom knowledge base before answering user queries. This component […]
Development / PHP / Server
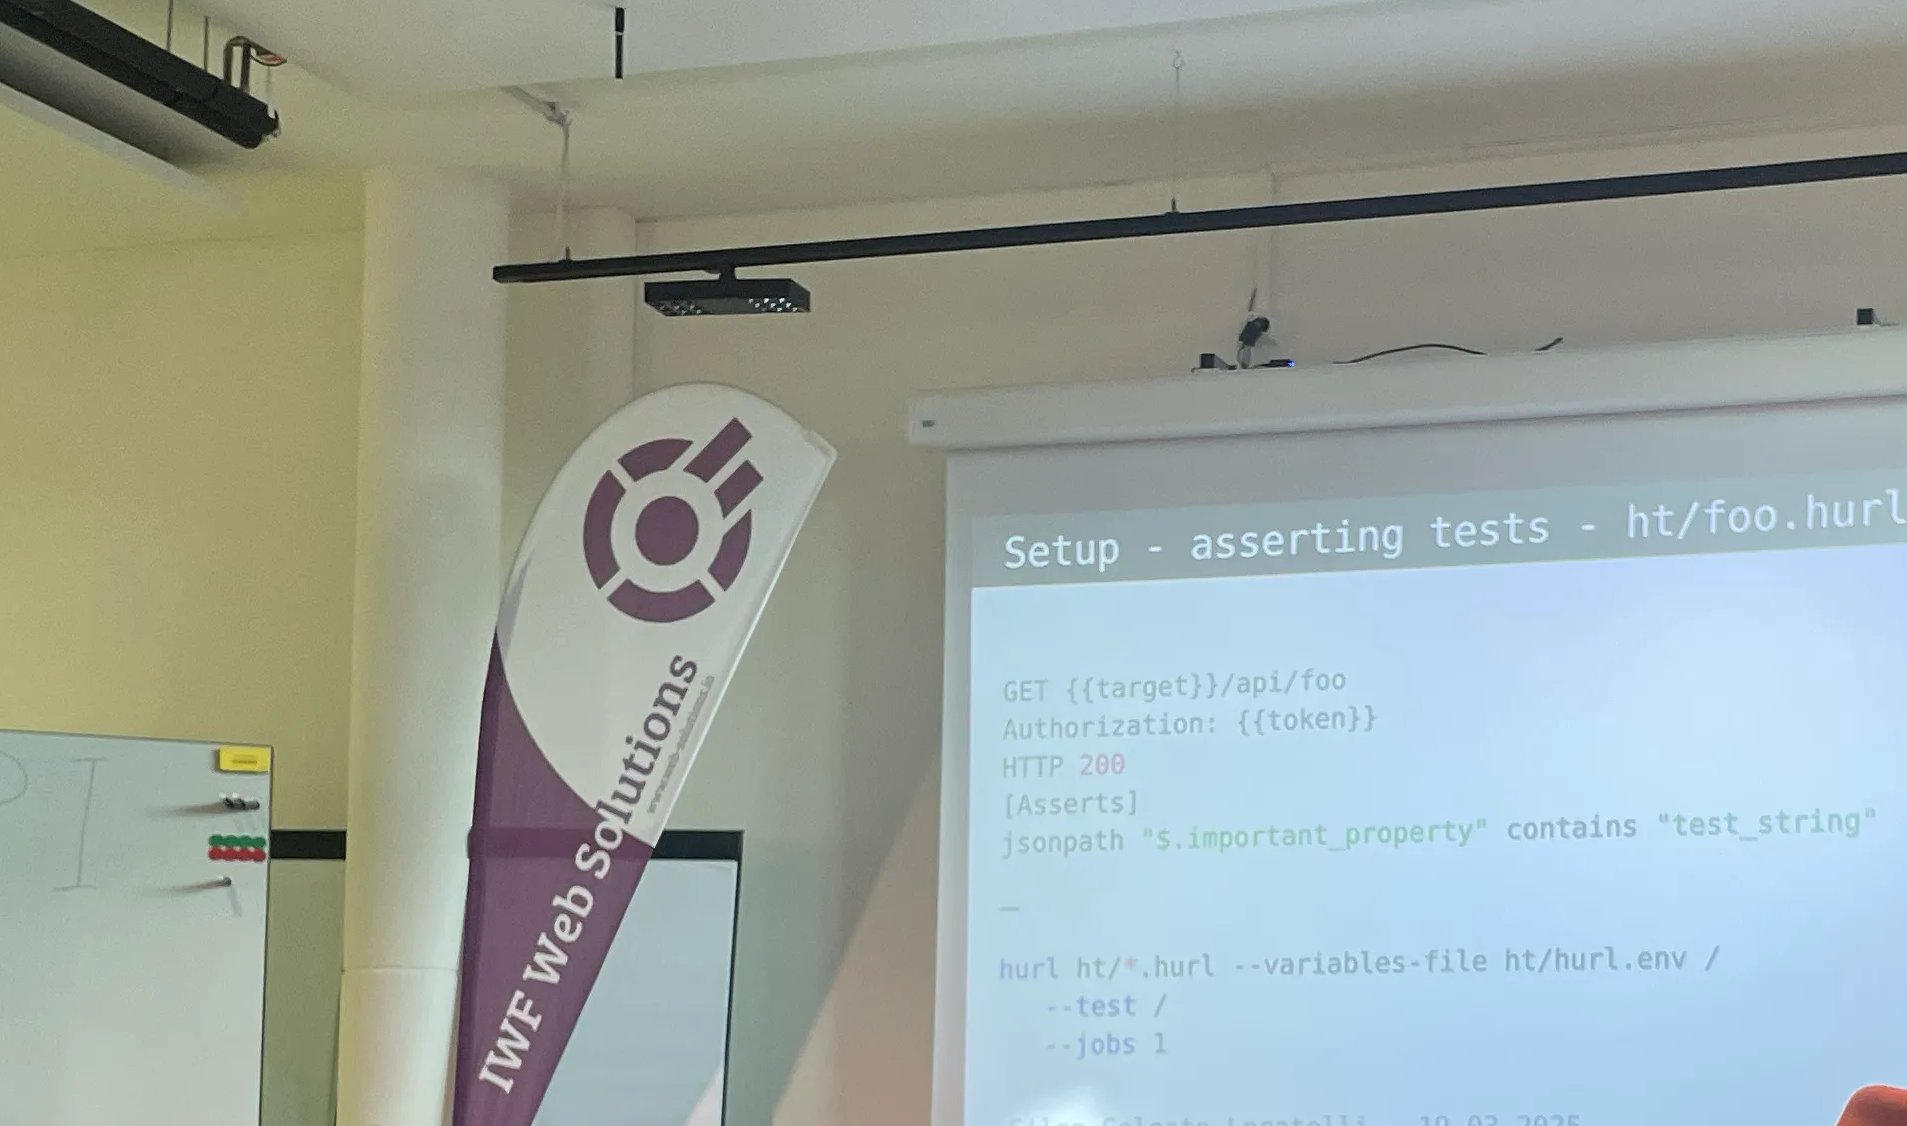
Rückblick: Symfony PHP Meetup Basel – 12. April
Gestern war ich beim Symfony PHP Meetup in Basel.. 1️⃣ hurl – ein leichtes Testing-Tool in Rust, für einfache API-Tests. 2️⃣ Ein Plugin zur Absicherung von JSON-Requests – mi einem Symfony-Plugin zur Absicherung eingehender JSON-Requests. Besonders interessant war: Die Flow-Erklärung, Der Einsatz von Compiler Passes, Und warum das Event nicht auf der Request-Ebene, sondern auf der Controller-Ebene ausgelöst wird – eine bewusste Designentscheidung für bessere Kontrolle und Trennung. 3️⃣ Symfony Clock Component – mit einem kleinen Live-Demo. Sie eignet sich ideal für testbare zeitbasierte Logik und wurde als internes Werkzeug für künftige Entwicklungen empfohlen. Danke an alle Speaker & PHP […]
Development / Linux / PHP / WSL 2
Resolving Laravel SQLite Locked Error in PhpStorm with WSL2
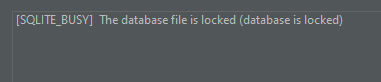
When working with SQLite databases stored in WSL2 and accessing them via PhpStorm, you might encounter the following error: Error encountered when performing Introspect schema main: [SQLITE_BUSY] The database file is locked (database is locked) This issue arises due to SQLite’s file locking mechanisms, which are not fully compatible with WSL2’s file system when accessed through tools like PhpStorm. Problem When you drag and drop an SQLite file from the WSL2 folder into PhpStorm’s Database tab, PhpStorm generates a default connection URL like this: This URL does not include parameters to prevent locking issues. As a result, SQLite encounters file […]

AI / Development / PHP
New Chameleon AI Model: Chameleon-Code_Explation_Gemma29b-v2
I am excited to introduce my new Chameleon AI model – Chameleon-Code_Explation_Gemma29b-v2! This model has been specifically developed to understand and explain the classes of the Chameleon CMS system and is optimized for efficient inference using 4-bit quantization. This makes the use of the model even more resource-efficient and faster. What is the Chameleon-Code_Explation_Gemma29b-v2 Model? Chameleon-Code_Explation_Gemma29b-v2 is a fine-tuned version of the Unsloth Gemma model and is based on a transformer-based language model. It has been trained to explain the structure and components of the Chameleon CMS system. The Chameleon CMS is a combination of shop software and content management […]
Development / PHP / WordPress
How to Fix WooCommerce and Polylang Integration for Multilingual Shops
If you’re using WooCommerce and Polylang together to create a multilingual eCommerce store on WordPress, you might have encountered issues with translated WooCommerce pages, such as: These issues occur because WooCommerce doesn’t natively support Polylang’s translation functionality out of the box. But don’t worry! Below, I’ll show you how to fix this using a simple piece of code that ensures WooCommerce can find the correct translated pages for each language. The Fix: Ensuring WooCommerce Finds Translated Pages with Polylang By applying the following code, we ensure WooCommerce works smoothly with Polylang. This code checks whether both WooCommerce and Polylang are […]

AI / Development / PHP
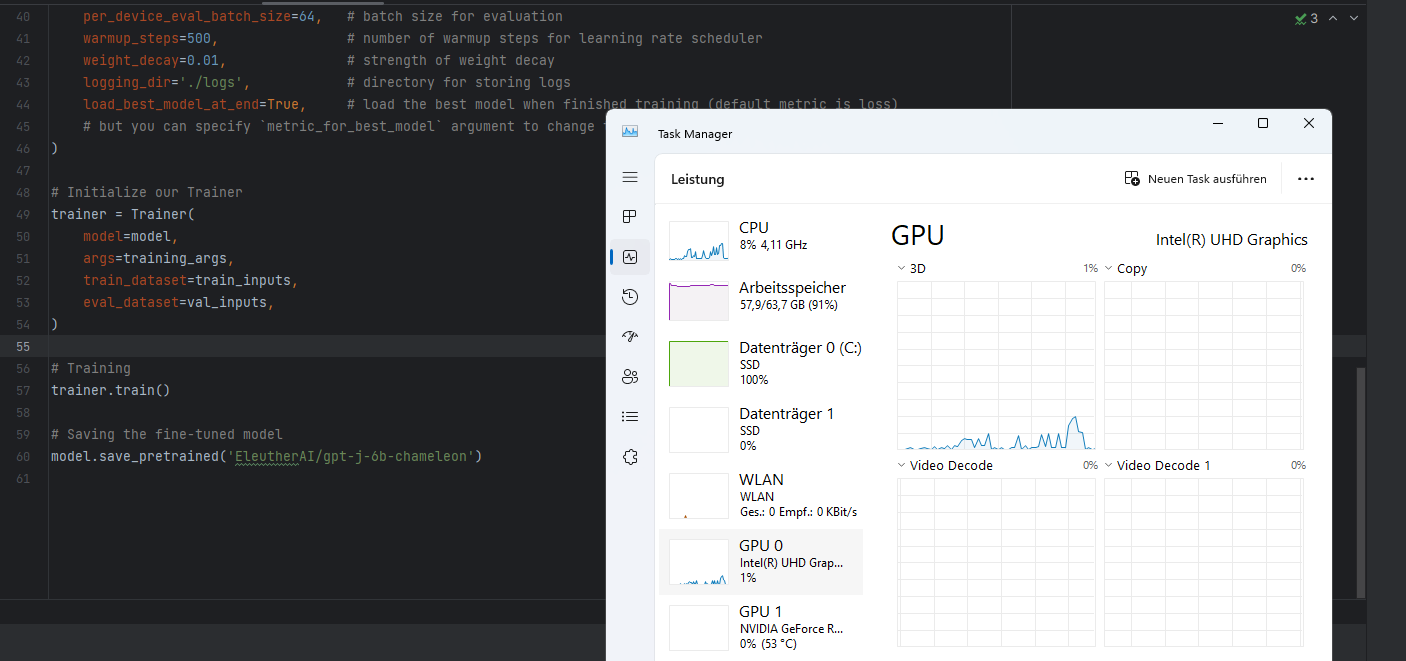
Accelerating Model Training with Unsloth: My Chameleon CMS AI Journey
In the rapidly evolving world of AI, staying ahead with cutting-edge tools and techniques is vital. Recently, I completed a successful model training session with Unsloth, a library designed for faster, more efficient model fine-tuning. My goal was to enhance the understanding and generation of PHP class explanations within the Chameleon CMS framework using the Gemma-2-9b model. Here’s a step-by-step recount of how I leveraged Unsloth to achieve fast, accurate results while keeping memory usage optimal Setting Up Unsloth for Model Fine-Tuning I began by installing the necessary packages for Unsloth and Flash Attention 2, a library crucial for softcapping […]
AI / Development / Linux / PHP / Server / Ubuntu
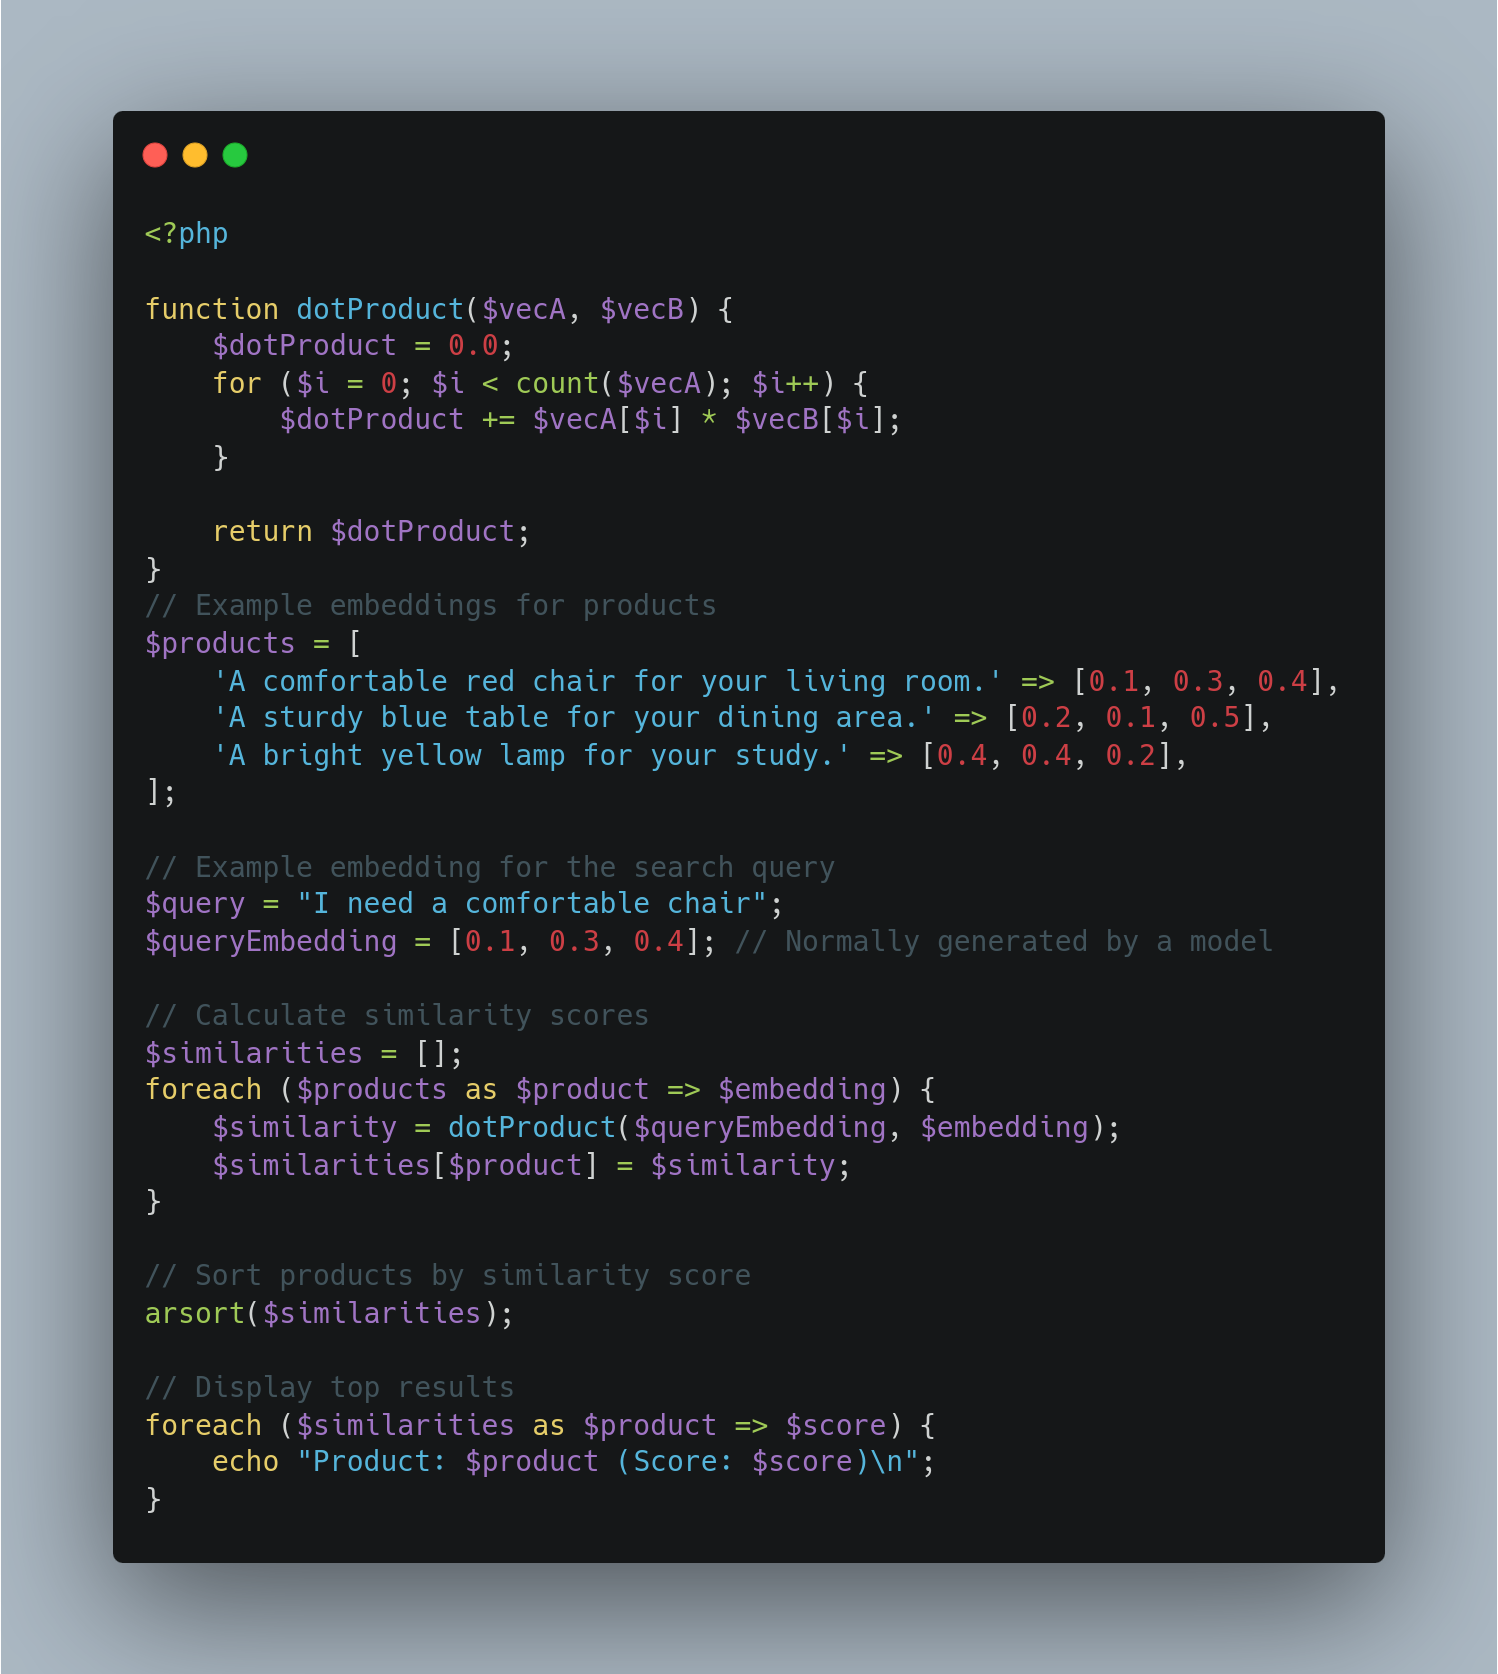
Building a Product Search System with Sentence Embeddings and Similarity Scoring
We will explore how to build a product search system that leverages sentence embeddings and similartiy scoring to improve search relevance. For this projekt, we need a lightweight model from “sentence-tansformers” library. Wyh: Because we need per Product Vector Space, that must be fast and stabil. I Founded this “all-MiniLM-L6-v2” model, is small, efficient and maps sentences to 384-dimensional dense vector space, making it suitable for tasks like semantic search. Let’s Start, Step 1: Setting Up the Envrioment: First, install the necessary library: Then, import the required modules and load the model: Step 2: Generation Embeddings: We will generate embeddings […]
Development / PHP / Ubuntu
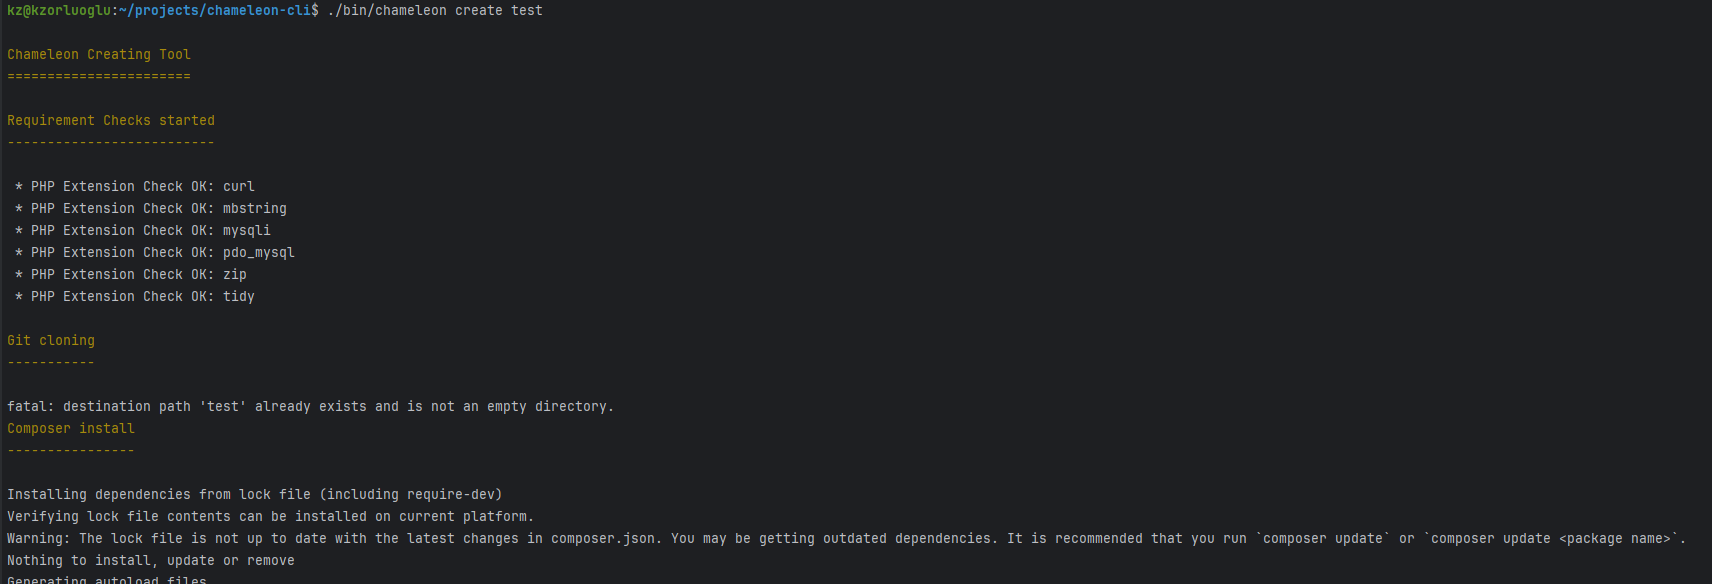
My Journey Creating a Chameleon CLI Tool Inspired by Laravel Installer and Symfony Create-Project
Github Link: https://github.com/kzorluoglu/chameleon-installer Asciiname URL: https://asciinema.org/a/rJL6Se0R943agLPneUSNmO3h4 asciinema Animation: Usage You can install the Chameleon Shop Installer globally using Composer: Creating a New Project Once installed, you can create a new Chameleon project using: Replace /path/to/your/new/shop with the desired directory for your new Chameleon Shop. The Inspiration: My journey began with Laravel’s CLI. Working with Laravel’s streamlined command-line interface always seemed to boost my productivity. On the flip side, my day job involves Symfony, which offers the powerful Symfony CLI. This overlap of technologies sparked an idea – why not create a globally runnable PHP installer binary using Composer? This project wasn’t just about […]

Development / PHP / Server
MySQL Database and User Create bash script v2
Usage: Here are the steps to make your create-db.sh script globally accessible: Optional: Rename the Script for Easier Access: If you want, you can rename the script to just create-db for ease of use: Views: 97
Development / Javascript / PHP / WordPress
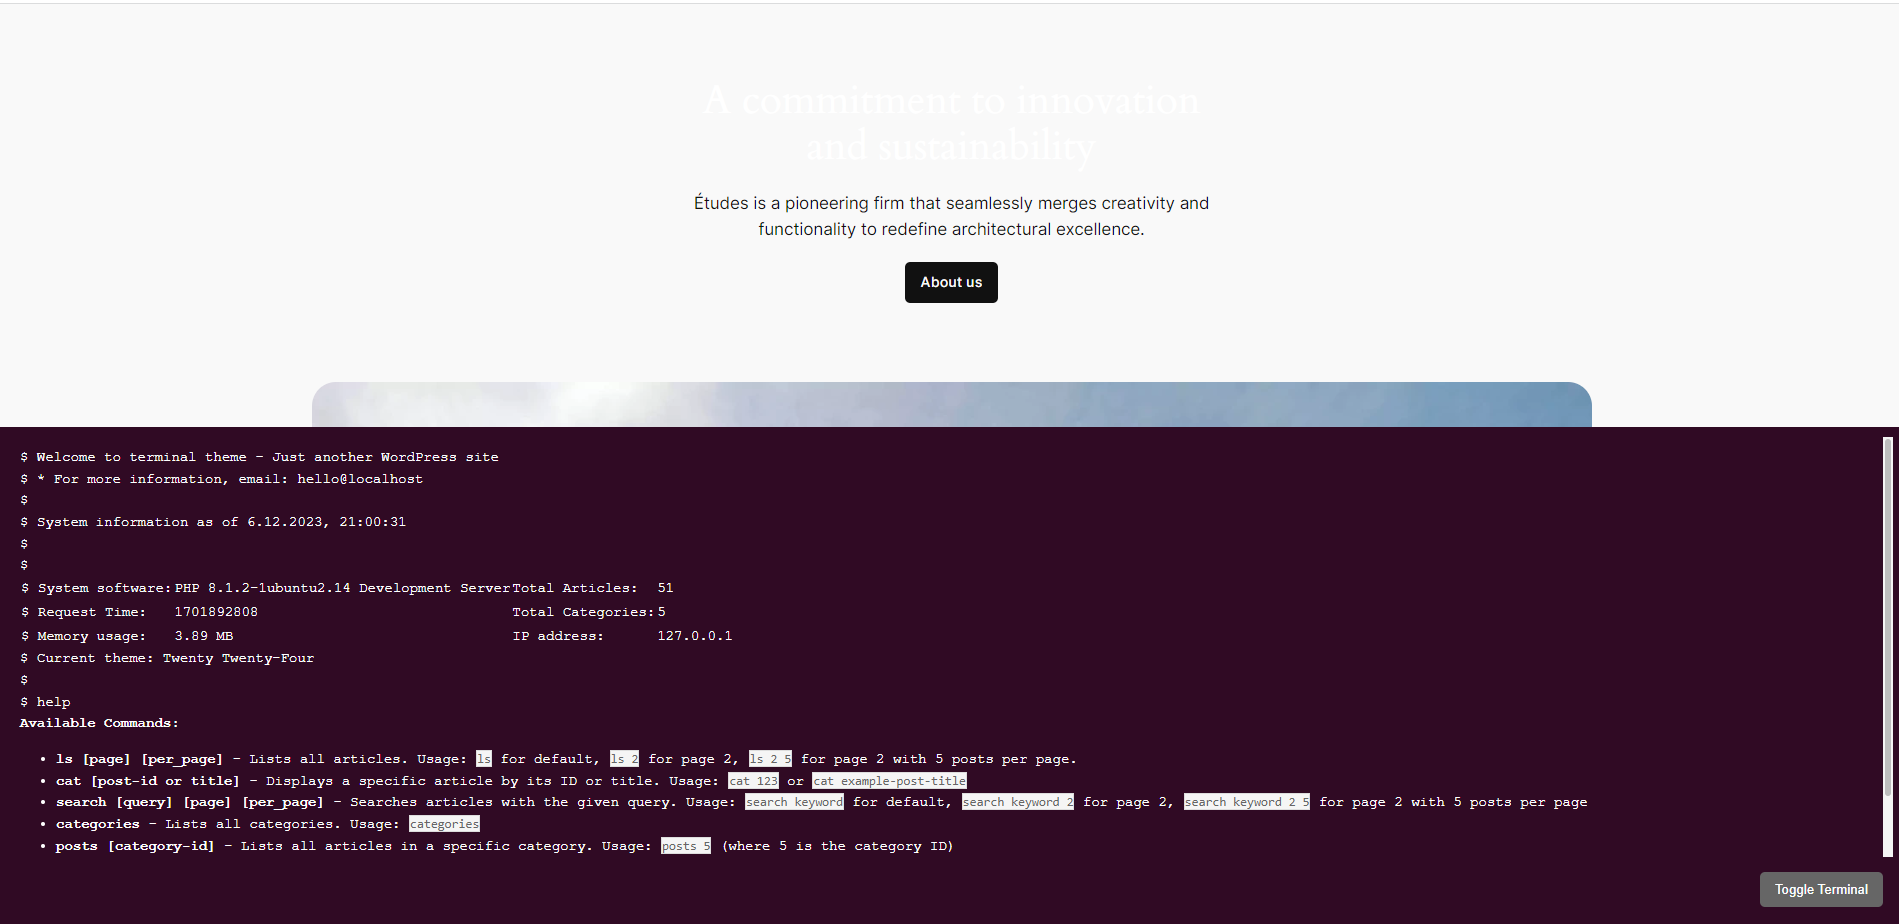
D8 Linux Terminal Widget: A Revolutionary WordPress Plugin
After developing the first-ever terminal theme for WordPress, I’ve taken it a step further. Today, I’m proud to introduce the “D8 Linux Terminal Widget” – a plugin that brings the power and aesthetics of a Linux terminal directly to your WordPress site, without the need to change your active theme. Installation To install the D8 Linux Terminal Plugin on your site, follow these steps: Everything is open source, here is the github repo. Views: 45
Development / Kubernetes / Linux / PHP / Server
MySQL Database and User Create bash script
Usage: Here is a simple script to achieve this: Here are the steps to make your create-db.sh script globally accessible: Optional: Rename the Script for Easier Access: If you want, you can rename the script to just create-db for ease of use: Views: 88
AI / Development / PHP
AI Model Trainer with EleutherAI/gpt-j-6b for Chameleon Shop Codes
The Trainer use actually the best chatgpt alternative model on huggingface. Here is the Training notice from Original Source: This model was trained for 402 billion tokens over 383,500 steps on TPU v3-256 pod. It was trained as an autoregressive language model, using cross-entropy loss to maximize the likelihood of predicting the next token correctly. https://huggingface.co/EleutherAI/gpt-j-6b#training-procedure Dataset Links: https://d8devs.com/chameleon-base-and-chameleon-shop-datasets-20230530-1918/ Views: 24
Development / PHP / Server
A runtime developer console, interactive debugger for Chameleon System 7.1.x
https://github.com/kzorluoglu/chameleon-bash #ChameleonShop #runtimeDeveloperConsole #InteractiveDebugger #psysh #symfony #php Views: 58
Development / PHP / Ubuntu
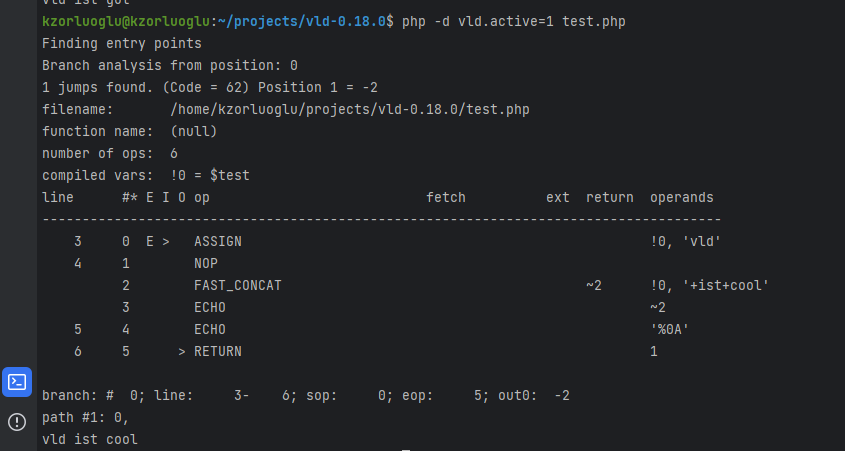
Dump PHP 8.1 OPCodes using Vulkan Logic Dumper with Bonus
The VLD a.k.a Vulkan Logic Dumper extension must be installed, we can compiling if from source. with the sudo make && sudo make install command, our vld extension is compilied and copied directly to the php extensions folder. The next step is to active the plugin in the php.ini file Let’s find our php.ini file. we found our php.ini file, now let’s active our vld extension with a text editor at the bottom of file, find the ;extension= section. Let’s add extension=vld, and save it.. We are all set!. and we can dump any php file with this vld.active=1 parameter. […]
Development / Helm / Kubernetes / PHP
How to develop PHP applications on Local Kubernetes with Helm
Dont Worry! It is Very Easy.. 🙂 Install the Helm CLI and k3s(/or minikube) as kubernetes before the begin. now let’s fill in the files. Chart.yaml project/index.php templates/deployment.yaml templates/ingress.yaml template/pv.yaml template/pvc.yaml template/service.yaml values.yaml and let’s install with helm Add hostname (simple-php.local) a.k.a domain in your /etc/hosts with any text editor. My /etc/hosts looking so; And check the domain in your browser with slash ( http://simple-php.local/ ) Enjoy! Views: 54
Development / Helm / Kubernetes / Linux / PHP / Server / Ubuntu
Cert-Manager – Kubernetes NGINX Ingress with Cert-Manager
Install Cert-manager is easy to install with Helm Package Manager. The first step is add Jetstack repository in our repository and becoming the package info with update Now we can install Cert-Manager with CRDs into our cluster: Cert-manager have also a kubectl plugin to easily manage configs and resources Configure for The Let’s Encrypt Certificate Views: 20
Development / Docker / Kubernetes / Linux / NodeJS / PHP / Server / Ubuntu
Local Multi-Domain Kubernetes for Development with Kind + Ubuntu + WSL2 + Docker Desktop
Installation WSL2 installation on Windows Install Ubuntu on WSL2 on Windows Docker Desktop Download Configuration After the Docker Desktop installation we need to enable the following WSL integrations at Docker Desktop: Views: 42
Development / Docker / Kubernetes / PHP / Ubuntu
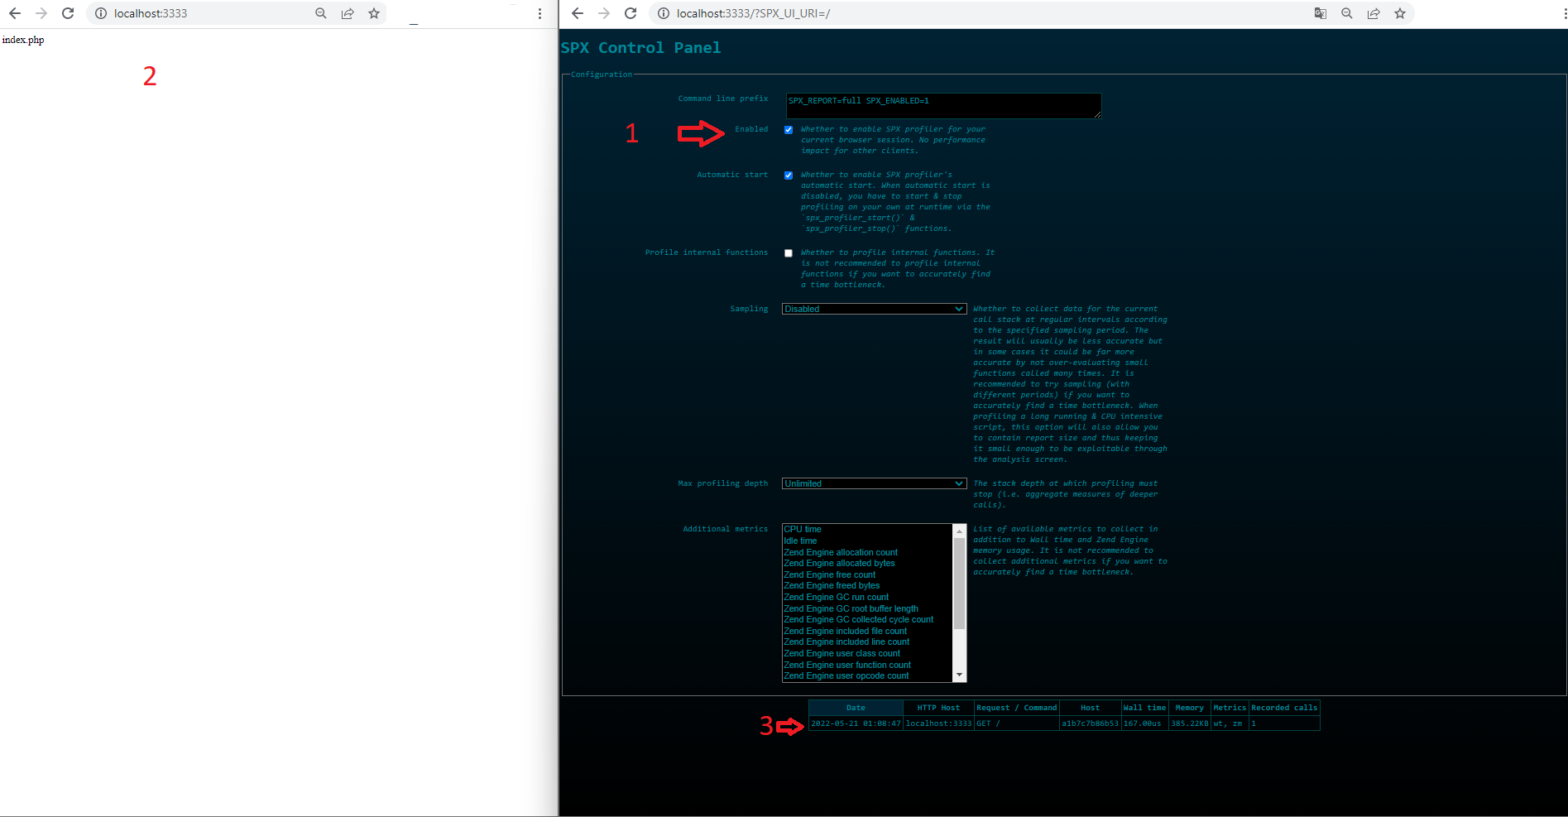
PHP Profiler SPX – A Another Simple Profiling Tool
SPX is a PHP Extension for Profiling, also open source, very simple, multimetric capable and with out-of-box web UI for listing, sorting and report details. For installation, we need to build our extension. We can of course put the building phases directly into our Dockerfile, but I want to know, what things (extension file, webUI Files and configuration changes) need to come through the extension. For this reason, I make a seperate build process in my Dockerfile and copy everything this extension needs. I follow the steps from official documentation (Timestamp: 20.05.2022), please check, if new or old steps were […]
Apple M1 / Development / PHP
PHP 8 with Xdebug 3 on Apple M1
We can install Xdebug via pecl on MacOS with Homebrew. Paste that in terminal. And see if the php interpreter with Xdebug working: to correctly configuration Xdebug, locate (or create) section in php.ini file. Finding your currently php.ini location, type this in terminal: php –ini Open the php.ini file. add it as follows at the last lines of file Enjoy! 😊 Views: 5
Apple M1 / Development / PHP
PHP 8 Installation on Mac M1 via homebrew
Install first homebrew, if it is not already installed. Paste that in macOS Terminal. And follow the ==> Next steps: after Installation add homebrew to your PATH Actually Default Image for php from Brew Package Repository is a PHP 8. Here we can see that: Thats means, we can simple install the php 8 in a macOS Terminal with this command brew install php, but we want to explicit install version 8, other versions can be declared as standard in the future. Paste that in terminal after that, you should be linked the installed php as system default php interpreter, […]
Development / PHP
PHPStorm – Symfony log highlighting
To do, go into Settings -> Editor -> Log Highlighting (Ideolog) Add new Log Format with the following config: special thanks to : https://locastic.com/blog/a-quick-way-to-browse-symfony-logs-with-phpstorm/ Views: 15
Development / PHP
PHPStan Config for Standalone Chameleon Project
Install Standard phpstan.neon file for standalone chameleon project. Run: Views: 53
Development / PHP
Symfony Certification – Step 1 : Prepare
Practice Old Smyfony 2 Certification Questions : How To Practice Symfony2 Certification Questions (Certificationy) Preparation Lists Symfony Certification Preparation List Learn for Symfony certification Views: 9
Development / Linux / PHP / Vagrant
Vagrant warning : Insecure world writable dir /usr/local/bin in PATH, mode 040777
For fix typ on your command line: Views: 17

Development / PHP
Symfony – MakerBundle” which is currently not installed.
Problem: Fix #1, open your .env file and update APP_ENV value with dev Fix #2 install maker bundle Views: 23
Development / PHP
Contao 3.5.X – PHP 7.2 Docker Image for Modul Development
1. Create a empty Folders data and database. 2. Create docker-compose.yml Views: 12
Development / Docker / PHP
Docker – LAMP Mariadb container fails to launch
Here is the Log Information one of them: For fixing set your volumes from mariadb with local driver. Views: 10
PHP
Oxid 6 – Admin Login -Fehler! Ihr Browser unterstützt keine Cookies.
The reason for the error is that encoding of the config.inc.php, please open a your config file with text editor (Notepad++, PhpStorm or etc.). Views: 7
Development / Docker / Linux / PHP / Server
Gitlab CI SSH Deploy
Create SSH Key on Remote host 2. Copy Generated Private key from remote Server Views: 15
Development / Docker / PHP / Server
GitLab CE – CI / CD for Standart PHP Projects and Auto Deploy
I have on my git repo two basic branches; master und develop Views: 5
Development / PHP
Git Bash inside PhpStorm
Go to: File -> Settings -> Tools -> Terminal If you are using 64 Bit Git Bash(Git for Windows) put this in the Shell Path field. Or for 32 Bit Git Bash put this in the field Views: 10
PHP
PSR-2 PHP_CodeSniffer Config
# phpcs.xml, this file must be under project root folder. <?xml version=”1.0″?> <ruleset name=”Basic Project Coding Standards”> <rule ref=”PSR2″ /> <!– extra rules for the laugh 😉 LOL –> <rule ref=”Generic.CodeAnalysis.EmptyStatement” /> <rule ref=”Generic.Classes.DuplicateClassName”/> <rule ref=”Generic.CodeAnalysis.EmptyStatement”/> <rule ref=”Generic.CodeAnalysis.UnconditionalIfStatement”/> <rule ref=”Generic.CodeAnalysis.UnusedFunctionParameter”/> <rule ref=”Generic.CodeAnalysis.UselessOverridingMethod”/> <rule ref=”Generic.ControlStructures.InlineControlStructure”/> <rule ref=”Squiz.PHP.NonExecutableCode”/> <file>./src</file> <file>./test</file> </ruleset> Views: 8
PHP
Travis CI for PHPUnit and PHP_CodeSniffer
# .travis.yml, this file must be under project root folder. language: php php: – 7.2 before_script: – composer self-update – composer install –prefer-source –no-interaction –dev script: – phpunit – ./vendor/bin/phpcs Views: 6
PHP
PHPUnit Boilerplate
Of course first phpunit/phpunit to be installed. I think, local installation much better. composer require –dev phpunit/phpunit ^7 # phpunit.xml <?xml version=”1.0″ encoding=”UTF-8″?> <phpunit backupGlobals=”false” backupStaticAttributes=”false” bootstrap=”vendor/autoload.php” colors=”true” convertErrorsToExceptions=”true” convertNoticesToExceptions=”true” convertWarningsToExceptions=”true” processIsolation=”false” stopOnFailure=”false”> <testsuites> <testsuite name=”Unit”> <directory suffix=”Test.php”>./tests</directory> </testsuite> </testsuites> <filter> <whitelist processUncoveredFilesFromWhitelist=”true”> <directory suffix=”.php”>./src</directory> </whitelist> </filter> </phpunit> # ExampleTest.php, this file must be under tests folder. (root/tests/ExampleTest.php) ?php namespace yourvendorname\yourpackagename; use PHPUnit\Framework\TestCase; /** * Description of ExampleTest * * @author Koray Zorluoglu <koray@d8devs.com> */ class ExampleTest extends TestCase { public function testExampleMethod() { $count = 0; $this->assertSame(0, $count); } } # Run on Command prompt. ./vendor/bin/phpunit # Example Output $ […]
Development / PHP
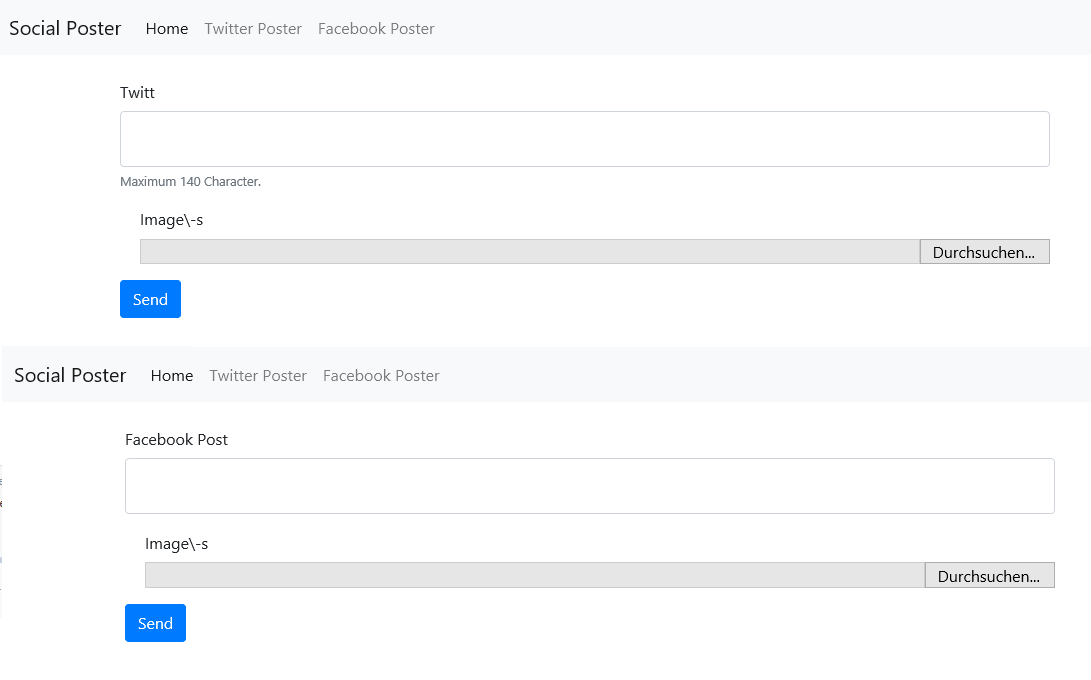
Social Poster – A Simple Facebook Page and Twitter poster
Social (Media) Poster Social Poster is a simple Facebook Page and Twitt poster Text Posting Text with Image-\s Posting Tech Social Poster uses a number of open source projects to work properly: facebook/graph-sdk – Facebook SDK for PHP (v5) dg/twitter-php – Twitter for PHP is a very small and easy-to-use library for sending messages to Twitter and receiving status updates. dillinger.io – Markdown editor for this readme.md creating/editing. Fast and easy to extend. Twitter Bootstrap – great UI boilerplate for modern web apps jQuery – duh Integration Facebook Create Facebook Developer Account Create Simple App You not need Facebook Products […]
Development / PHP
My Experiences with Laravel 5.5
First Project / Look : I have had some experience in module writing my company software solution for an Aid Organization. This project was with Laravel 5.1, what the customer wants as a correction or update… What have I had? First of all, some pre-installed plugins(from the old developer at company) need to be updated, because these plugins work not nicely or stable.. But isn’t possible, because XYZ Plugin needed higher version another ABC, DEF Plugins, this plugin needed higher version of laravel/framework. If I framework updated, then you get several errors, because main core functions or classes changed or […]
Development / Linux / PHP / Raspberry Pi Zero W / Server
Raspberry Pi Zero W + USB Modem – SMS Gateway
This Article updated on 08.09.2019 Install usb-modeswitch, smstools, wvdial sudo apt-get install usb-modeswitch usb-modeswitch-data smstools wvdial Find right device and baudrate with this command; sudo wvdialconf …my modem information (modem on ttyUSB1 and baudrate 9600)… ttyUSB0<*1>: ATQ0 V1 E1 — failed with 2400 baud, next try: 9600 baud ttyUSB0<*1>: ATQ0 V1 E1 — failed with 9600 baud, next try: 9600 baud ttyUSB0<*1>: ATQ0 V1 E1 — and failed too at 115200, giving up. ttyUSB1<*1>: ATQ0 V1 E1 — OK ttyUSB1<*1>: ATQ0 V1 E1 Z — OK ttyUSB1<*1>: ATQ0 V1 E1 S0=0 — ERROR ttyUSB1<*1>: ATQ0 V1 E1 &C1 — ERROR […]